Before and After: Photoshop Tutorial on Digital Backgrounds
/The videos from yesterday did not disappoint. I think this is an edit even someone fairly new to Photoshop could tackle. I did not use the magic wand tool as was suggested in the Phlearn video just b/c I am more comfortable with the Quick Selection Tool. I did use the Refinement Brush for the wisps of hair as was suggested and otherwise followed the tutorials as outlined. I got the digital background I used for these from one I had on file, but I believe it was from www.squijoo.com. After pasting in the digital background and sizing it appropriately, I added some color saturation, hue adjustments and finally a little bit of Gaussian Blur, more specific detail below. Photoshop makes the possibilities endless!!
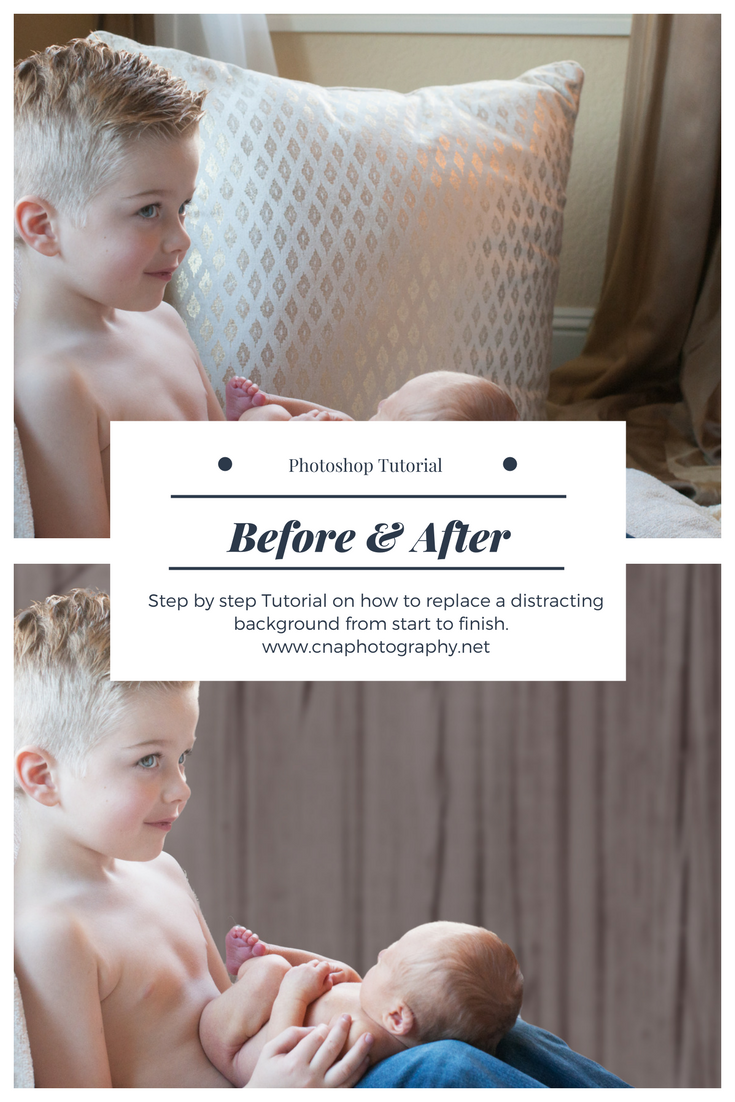

Thumbs down on this background but thumbs up on that cute face!
While I was setting up this shot, this little guy was getting a pep talk from his mom. I couldn't resist snapping a couple of pics of that cute face, even though it wasn't an ideal background.

I used the Quick Selection Tool to Select Subject.
I included the pillow he was leaning against to simplify things. As soon as you click the Quick Selection Tool, a series of boxes opens up in the upper left hand corner of the screen. You can also see here I did a rough outline of his body and accidentally included the upper left portion of the image.

The +brush and the -brush.
I used the -brush and "subtracted" away the corner in the upper left that I didn't want to include. I had to make a few other adjustments near the baby's feet and by the boy's profile.
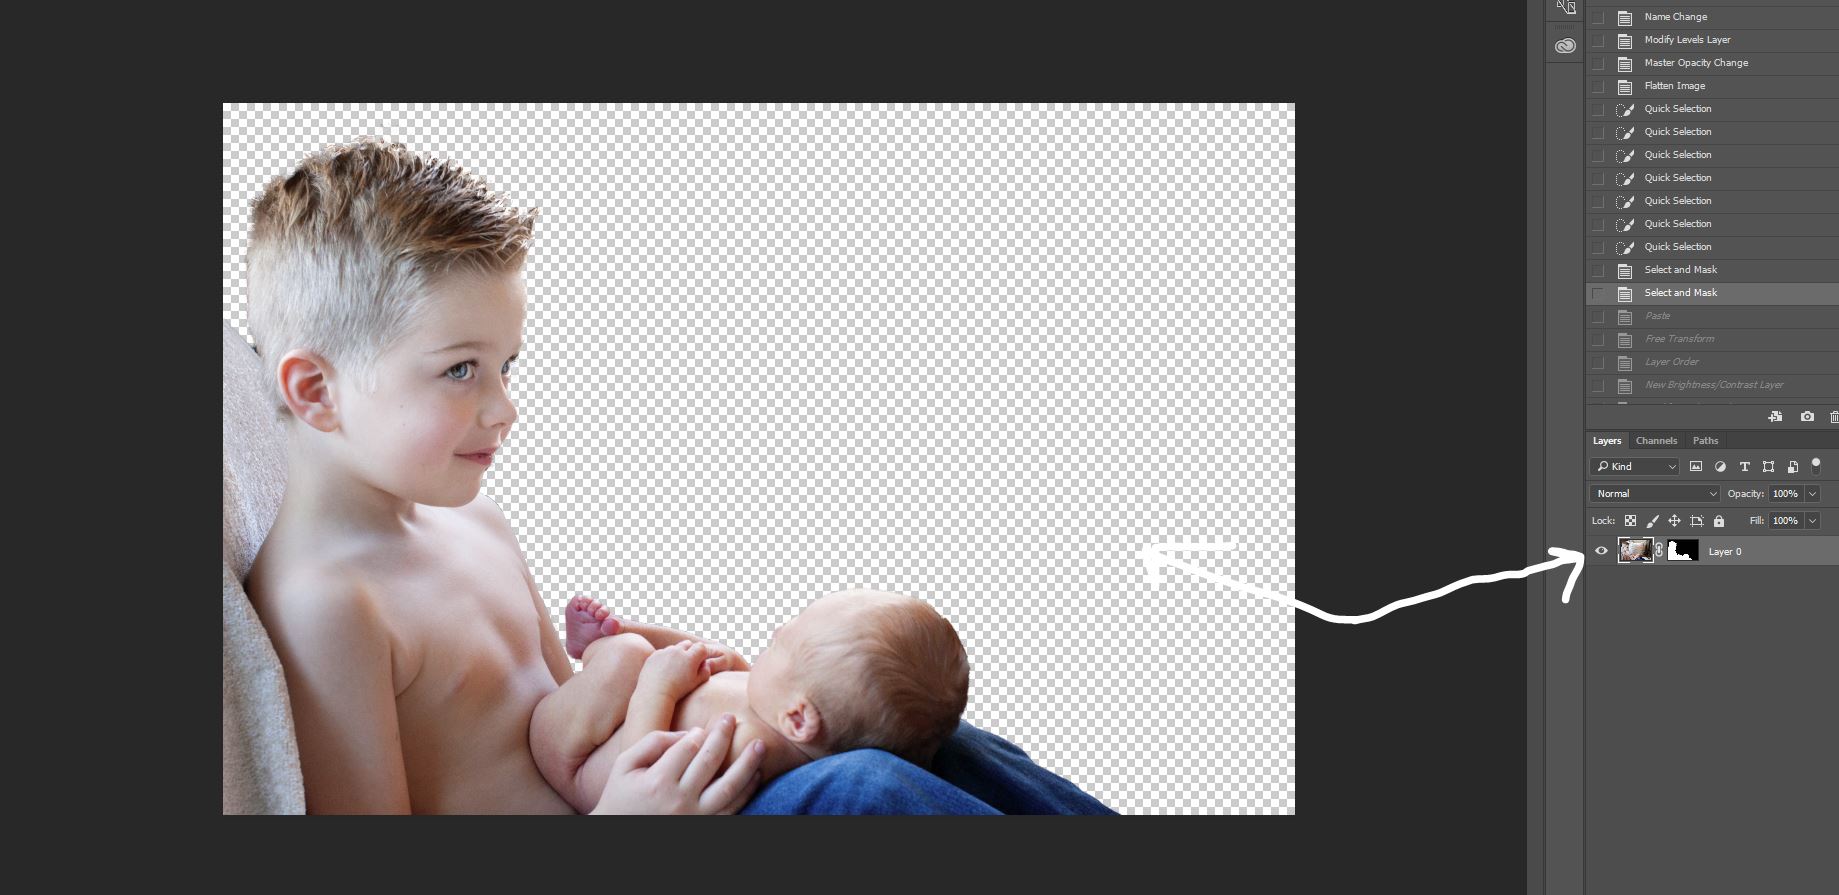
Layer Mask
As soon as I added the layer mask, the background magically disappeared. I used the refine tool here to brush up around his hair and by his face to get all the details.

New background
I selected the digital background image, and pasted it into my layered image. I moved the new background layer below the layered image and VOILA! I had a new background. I didn't like the starkness of the background, but it was already looking much better than before.
Are you having fun yet!??

Adjust Hue, Saturation, Brightness, etc.
I just started playing around with the adjustment dials until I had a background color and shade that I liked.
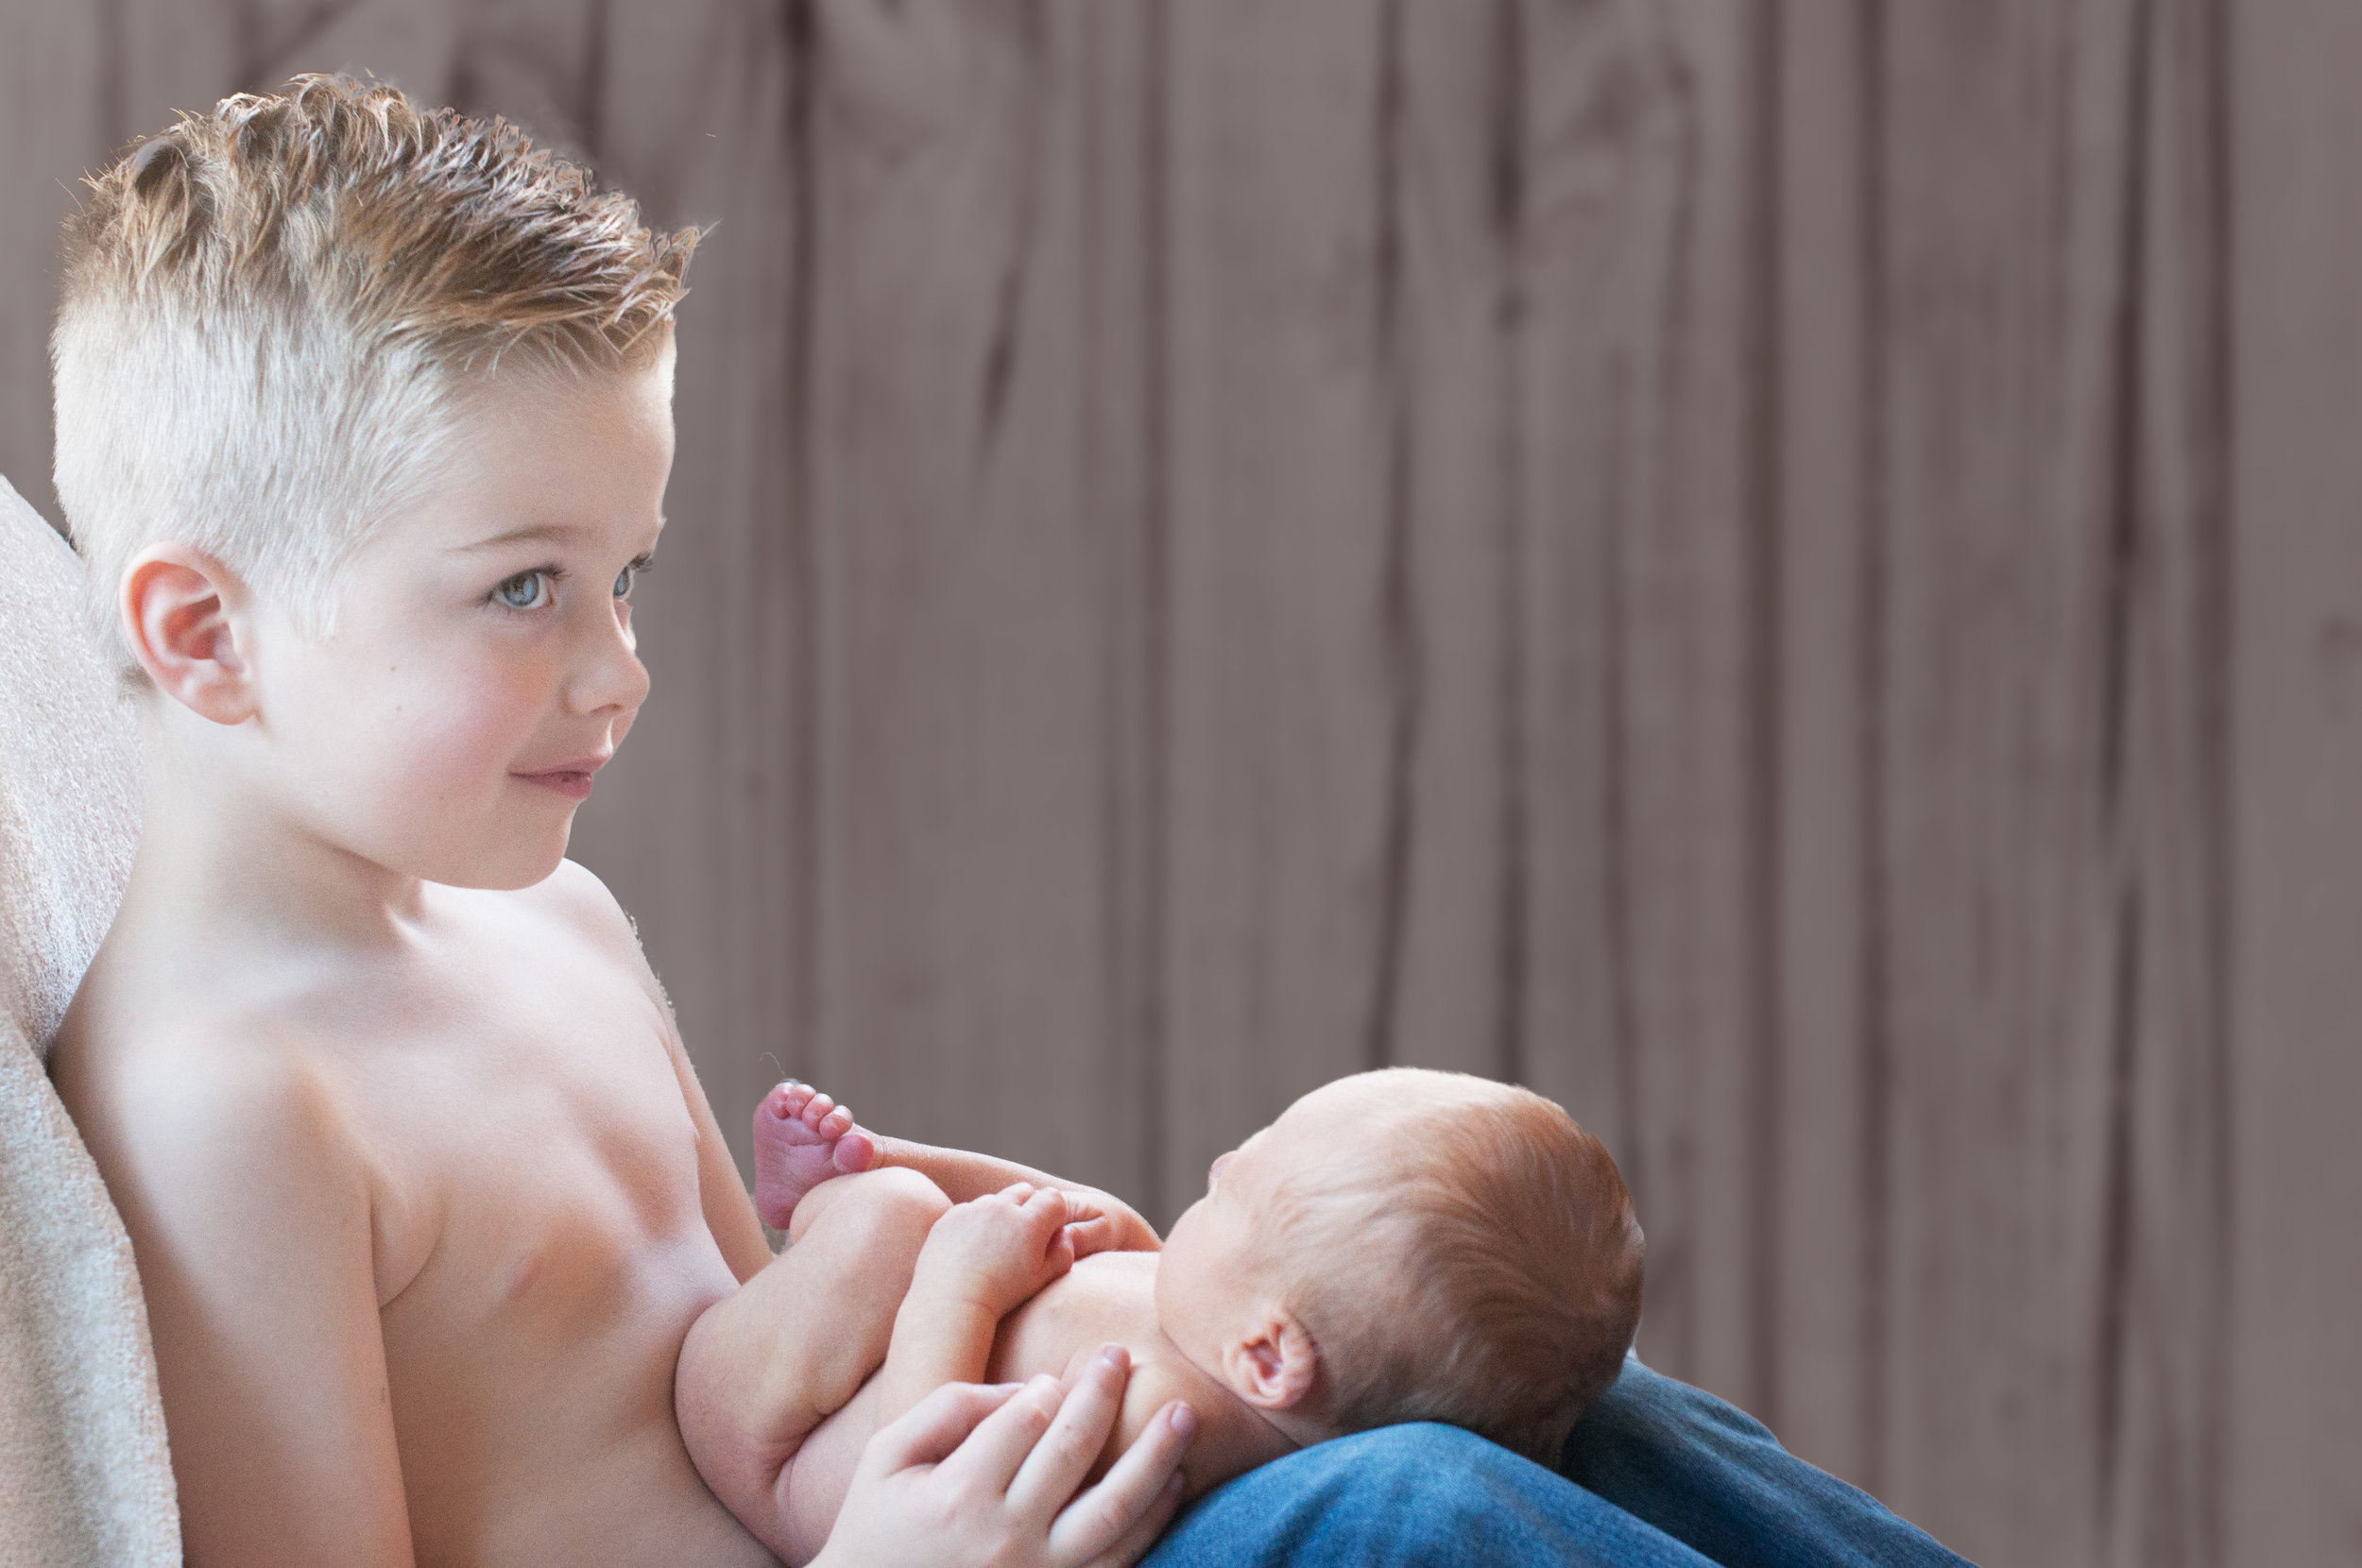
Gaussian Blur
Finally, I added a little blur to the background layer and touched up the image a little with some personal preference enhancements.
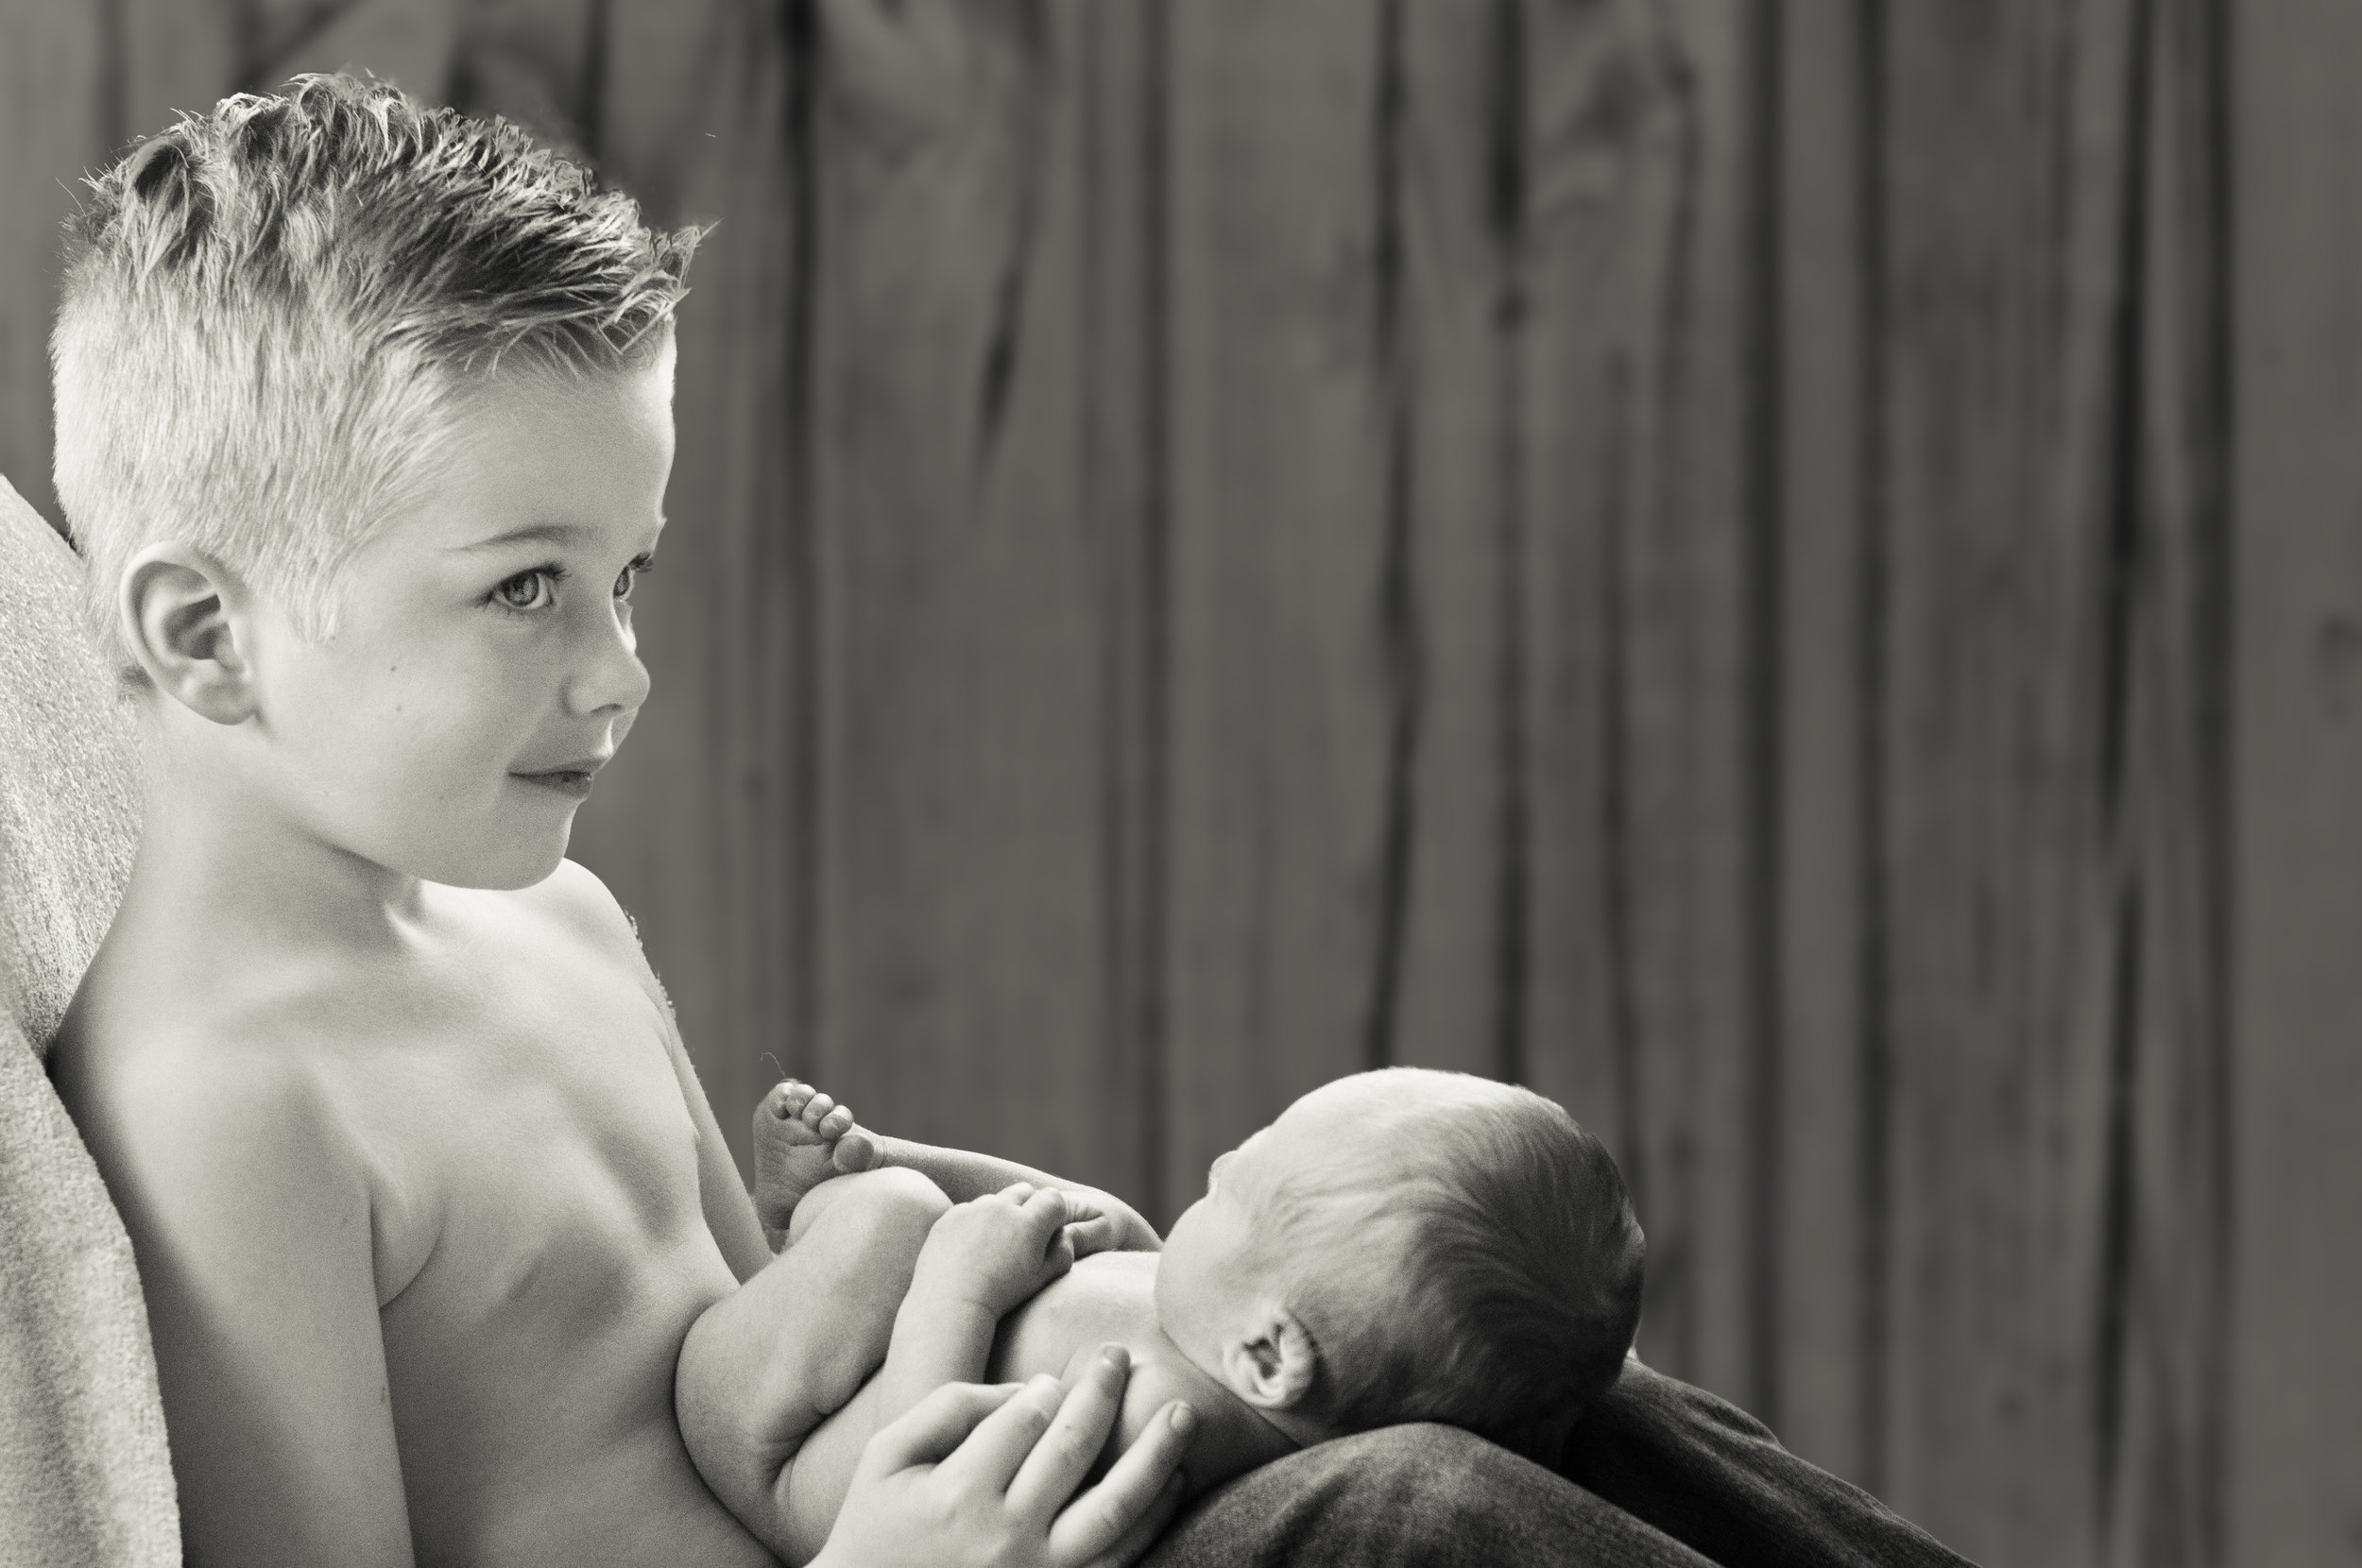
Black and White
And just b/c I am a sucker for a good black and white image, I played with this image as BW and loved how it turned out.
What image are you going to try and salvage with a new background?